Veneered MDF, a popular choice for flooring due to its aesthetic appeal and durability, combines the smooth surface of Medium Density Fiberboard (MDF) with a thin layer of real wood veneer. As a veneered MDF supplier, I'm here to guide you through the process of installing veneered MDF on floors. This comprehensive guide will cover everything from preparation to the final touches, ensuring a successful installation.
Preparation
Before you start the installation process, it's crucial to make proper preparations. This step sets the foundation for a smooth and long - lasting flooring installation.
Measure the Area
First, accurately measure the floor area where you plan to install the veneered MDF. Measure the length and width of each room, and calculate the total square footage. It's advisable to add an extra 5 - 10% to account for cutting waste and any mistakes during installation. This will ensure you have enough material to complete the project.
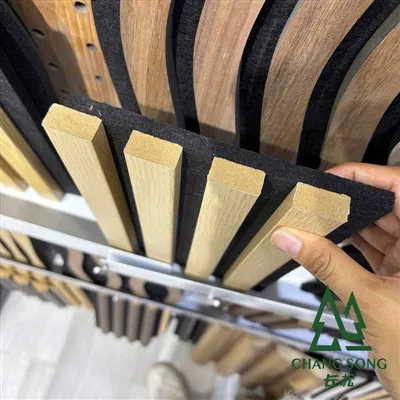
Select the Right Veneered MDF
As a supplier, I offer a wide range of veneered MDF products, such as Melamine Faced MDF, Oak MDF Sheets, and Slotted Wall MDF. Consider the style, color, and durability requirements of your space when choosing the veneered MDF. For high - traffic areas, opt for a more durable veneer and finish.
Acclimate the Veneered MDF
Veneered MDF can expand or contract due to changes in temperature and humidity. To prevent problems such as buckling or gaps after installation, it's essential to acclimate the material. Leave the veneered MDF in the room where it will be installed for at least 48 - 72 hours. Keep the material stacked flat and in a well - ventilated area.
Prepare the Subfloor
The subfloor must be clean, dry, and level. Remove any existing flooring, debris, or adhesives from the subfloor. Use a floor leveler to correct any uneven areas. A level subfloor is crucial for the proper installation of veneered MDF and to prevent premature wear and tear.
Tools and Materials
Gather all the necessary tools and materials before you start the installation. Here's a list of what you'll need:
Tools
- Tape measure
- Utility knife
- Jigsaw or circular saw
- Hammer
- Nails or staples
- Flooring adhesive (if required)
- Tapping block
- Pull bar
- Rubber mallet
- Chalk line
Materials
- Veneered MDF panels
- Underlayment (optional but recommended)
- Nails or staples
- Flooring adhesive (if using the glue - down method)
Installation Methods
There are several methods to install veneered MDF on floors, including the floating floor method, nail - down method, and glue - down method.
Floating Floor Method
The floating floor method is one of the most popular ways to install veneered MDF. It involves laying the panels on top of an underlayment without attaching them directly to the subfloor.
- Lay the Underlayment: Roll out the underlayment over the subfloor, starting from one corner of the room. Overlap the seams by at least 2 inches and tape them together. The underlayment provides cushioning, sound insulation, and moisture protection.
- Start Laying the Panels: Begin laying the veneered MDF panels along the longest wall in the room. Align the tongue of one panel with the groove of the next panel and press them together firmly. Use a tapping block and rubber mallet to ensure a tight fit.
- Cut the Panels: As you approach the end of a row, measure and cut the last panel to fit. Use a jigsaw or circular saw to make the cut. Leave a 1/4 - inch expansion gap around the perimeter of the room to allow for expansion and contraction.
- Continue Laying Rows: Start the next row by cutting a panel in half and using the half - panel to begin the row. This will stagger the joints and create a more stable floor. Continue laying the panels row by row until the entire floor is covered.
Nail - Down Method
The nail - down method involves attaching the veneered MDF panels directly to the subfloor using nails or staples.
- Mark the Layout: Use a chalk line to mark the layout of the panels on the subfloor. This will help you keep the panels straight and evenly spaced.
- Lay the Panels: Place the first panel along the marked line and secure it to the subfloor using nails or staples. Make sure to drive the nails or staples at a 45 - degree angle into the tongue of the panel.
- Cut and Fit Panels: Measure and cut the panels as needed to fit the room. Leave a 1/4 - inch expansion gap around the perimeter.
- Continue Installation: Continue laying the panels row by row, nailing or stapling each panel to the subfloor. Use a tapping block and rubber mallet to ensure a tight fit between the panels.
Glue - Down Method
The glue - down method is suitable for areas where you need a more permanent installation.
- Apply the Adhesive: Use a notched trowel to apply a thin layer of flooring adhesive to the subfloor. Follow the manufacturer's instructions for the correct amount and application method.
- Lay the Panels: Place the veneered MDF panels on the adhesive, starting from one corner of the room. Press the panels firmly into the adhesive and use a rolling pin to remove any air bubbles.
- Cut and Fit Panels: Measure and cut the panels to fit the room, leaving a 1/4 - inch expansion gap around the perimeter.
- Allow the Adhesive to Dry: Let the adhesive dry according to the manufacturer's instructions before walking on the floor or moving furniture onto it.
Finishing Touches
Once the veneered MDF is installed, there are a few finishing touches to complete the project.
Install Baseboards
Install baseboards around the perimeter of the room to cover the expansion gap and give the floor a finished look. Use a miter saw to cut the baseboards at a 45 - degree angle for a professional finish.


Clean the Floor
Clean the floor thoroughly to remove any dust, debris, or adhesive residue. Use a soft - bristle broom or vacuum cleaner to clean the surface, and then wipe it down with a damp mop.
Apply a Finish
To protect the veneered MDF and enhance its appearance, apply a finish such as polyurethane or wax. Follow the manufacturer's instructions for the application process and drying time.
Maintenance
Proper maintenance is essential to keep your veneered MDF floor looking its best for years to come.
- Regular Cleaning: Sweep or vacuum the floor regularly to remove dirt and debris. Use a damp mop to clean the floor, but avoid using excessive water.
- Avoid Scratches: Place felt pads on the legs of furniture to prevent scratches. Avoid dragging heavy objects across the floor.
- Protect from Moisture: Wipe up spills immediately to prevent moisture from seeping into the veneer and causing damage. Use area rugs in high - traffic areas and near entryways to protect the floor.
Conclusion
Installing veneered MDF on floors is a rewarding project that can transform the look of your space. By following these steps and using the right tools and materials, you can achieve a beautiful and durable floor. As a veneered MDF supplier, I'm committed to providing high - quality products and excellent customer service. If you're interested in purchasing veneered MDF for your next project, I invite you to contact me for more information and to discuss your specific requirements. Let's work together to create the perfect floor for your home or business.
References
- "Flooring Installation Guide" - Flooring Manufacturers Association
- "Veneered MDF: Properties and Applications" - Woodworking Magazine
- Manufacturer's installation instructions for veneered MDF products