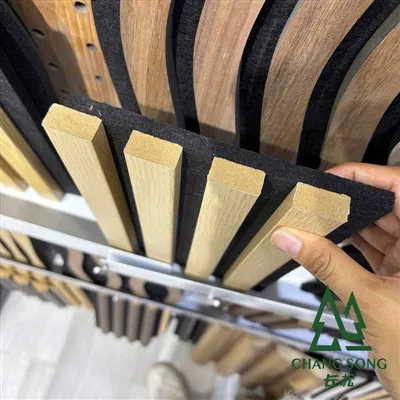
Hey there! As a supplier of MDF Acoustic Panels MDF Acoustic Panel, I've got a ton of experience with these panels, and I'm super excited to share with you how to paint them. Painting MDF acoustic panels can not only enhance their aesthetic appeal but also provide some extra protection. So, let's dive right in!
Preparing Your Workspace
First things first, you need to set up a proper workspace. Find a well - ventilated area, like a garage or an outdoor space. Good ventilation is crucial because the fumes from paint can be pretty strong and harmful if inhaled in large amounts. You don't want to end up feeling dizzy or sick.
Lay down some drop cloths or old newspapers to protect the floor and surrounding areas from paint splatters. Trust me, it's way easier to clean up a mess when you've got something to catch the paint.
Gathering Your Materials
Here's what you'll need:
- MDF Acoustic Panels: Obviously, you've got these already if you're reading this. Make sure they're in good condition, free of any major dents or scratches.
- Paint: Choose a high - quality paint that's suitable for MDF. Latex paint is a great option as it's easy to work with and dries relatively quickly. You can pick any color you like, depending on your interior design plans.
- Primer: A good primer is essential. It helps the paint adhere better to the MDF and provides an extra layer of protection.
- Paintbrushes and Rollers: Get a variety of sizes. Small brushes are great for detailed work, like around the edges and corners, while rollers are perfect for covering large areas quickly.
- Sandpaper: Medium - grit sandpaper (around 120 - 150 grit) will help smooth the surface of the MDF and give the primer and paint something to grip onto.
- Masking Tape: Use this to protect areas you don't want to paint, like the edges of the panel or any adjacent surfaces.
Preparing the MDF Acoustic Panels
Before you start painting, you need to prepare the panels. Begin by sanding the surface of the panels gently. This removes any rough spots and dust, and it also helps the primer stick better. Wipe the panels down with a clean, dry cloth to get rid of any sanding dust.
Next, apply masking tape to any areas you want to keep paint - free. This could be the edges of the panel or parts that are going to be attached to other surfaces later. It's a small step, but it can make a big difference in the final look.
Applying the Primer
Now it's time to apply the primer. Stir the primer well to make sure it's thoroughly mixed. Dip your paintbrush or roller into the primer and apply a thin, even coat to the MDF panel. Start at one corner and work your way across the panel in smooth, overlapping strokes.
Let the primer dry completely. This usually takes a few hours, but it can vary depending on the type of primer and the environmental conditions. You can check if it's dry by gently touching it. If it feels dry to the touch and doesn't leave any residue on your finger, it's ready for the next step.
Painting the Panels
Once the primer is dry, it's time to paint. Stir your paint well, just like you did with the primer. You can start with a paintbrush for the edges and corners, then use a roller for the larger areas. Apply the paint in thin, even coats. Don't try to cover everything in one thick coat, as this can lead to drips and an uneven finish.
After the first coat, let it dry for a few hours. You can then apply a second coat if needed. Most of the time, two coats will give you a nice, solid color. Make sure each coat is completely dry before applying the next one.
Finishing Touches
Once the paint is dry, carefully remove the masking tape. Be gentle so you don't peel off any paint. Inspect the panels for any drips or rough spots. If you find any, you can sand them down gently with fine - grit sandpaper and then touch up the area with a little more paint.
Benefits of Painted MDF Acoustic Panels
Painted MDF acoustic panels have several benefits. Firstly, they can match any interior design scheme. You can choose a color that complements your existing furniture, walls, or decor. Secondly, the paint provides an extra layer of protection to the MDF, making it more durable and resistant to wear and tear.
Moreover, painted acoustic panels can be used in various settings. Whether it's a home theater, a recording studio, or an office space, they not only improve the acoustics but also add a touch of style. For instance, you can create an Acoustic Panel Wall in your home theater to enhance the sound quality and make the room look more inviting.
Tips and Tricks
- Test on a Small Area: Before you start painting the entire panel, it's a good idea to test the paint and primer on a small, inconspicuous area. This allows you to see how the colors look and how the paint adheres to the MDF.
- Use a Drop Cloth Under the Panel: When painting, place a drop cloth under the panel to catch any drips that might fall from the bottom.
- Keep the Paint Stirred: Throughout the painting process, keep stirring the paint to ensure an even color and consistency.
Conclusion
Painting MDF acoustic panels is a fun and rewarding DIY project. With the right materials, a little patience, and some basic skills, you can transform these functional panels into beautiful decorative elements for your space.
If you're interested in purchasing high - quality MDF acoustic panels for your next project, I'd love to have a chat with you. We offer a wide range of MDF acoustic panels that are perfect for various applications. Whether you're a homeowner looking to improve your home's acoustics or a business owner in need of soundproofing solutions, we've got you covered. Reach out to us to discuss your requirements and get a quote. Let's work together to create the perfect acoustic environment for you!


References
- "Painting MDF: A Comprehensive Guide", Home Decor Magazine, 2022
- "Acoustic Panels: Types and Applications", Sound Engineering Journal, 2023